
How to Edit a Selfie: The 6-Step Order and the Right Filter Strength
A good edit takes a minute, and the order matters more than the app. Fix the frame first, then the light, then the color, and add a filter last at low strength. Do it the other way round and you'll end up fighting the filter.
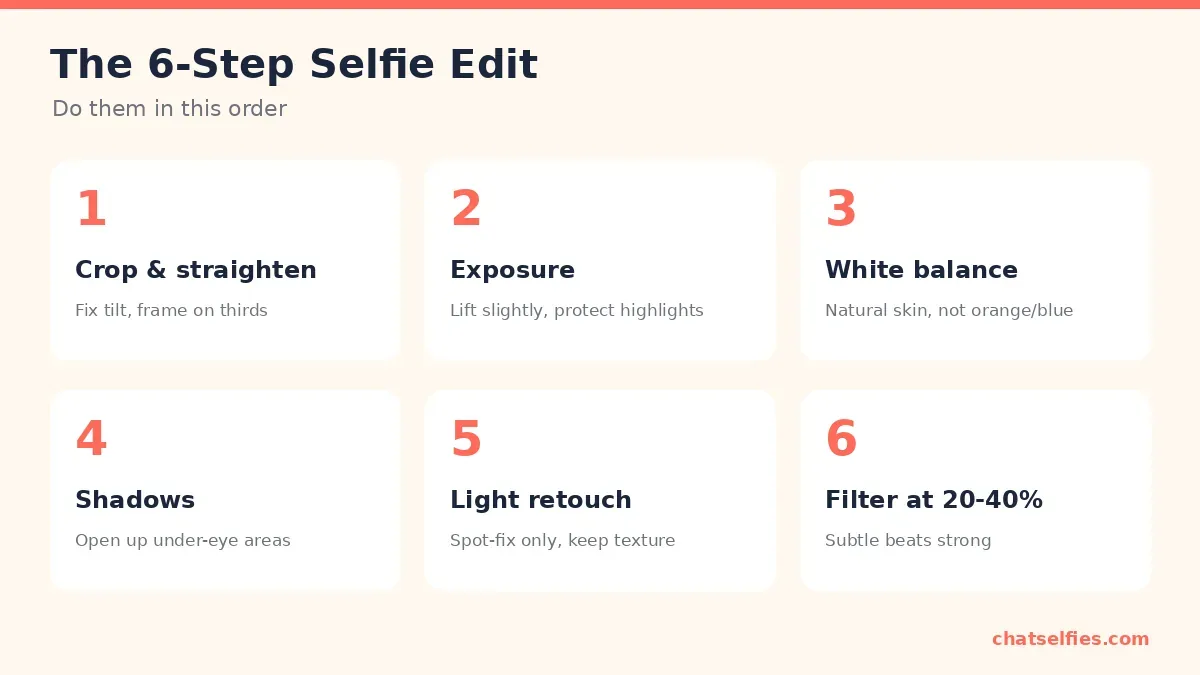
The six steps, in order
1. Crop and straighten
Level any tilted horizon or door frame, then crop so your eyes sit near the top third of the frame. Cropping in also fixes a face that looks too small or a cluttered edge. Don't crop so tight that the photo looks soft. If you shot from arm's length, there's usually room.
2. Exposure
Brighten slightly if your face is a little dark, but watch the brightest areas (a window, a white shirt, the shine on your forehead). Once those turn pure white, the detail is gone. "Lift slightly, protect highlights" is the rule.
3. White balance
Indoor bulbs make skin look orange; shade and screens make it look blue. Move the warmth (temperature) slider until skin looks like skin and anything white in the shot looks white, not cream or blue. A small tint adjustment fixes green or magenta casts.
4. Shadows
Raising shadows opens up under the eyes and the side of the face away from the light, without making the whole picture brighter. It's the most flattering single slider for selfies. Too much makes a flat, grey look, so stop when it starts to look washed out.
5. Light retouch
Use a spot-healing or blemish tool on temporary things: a spot, a stray hair, a crumb. Leave skin texture, freckles and smile lines alone. If you use a skin-smoothing slider, keep it low enough that pores are still visible at full size.
6. Filter at 20-40%
Filters are a finishing touch, not a fix. Apply one last, then pull its intensity down to somewhere between 20% and 40%. At full strength most filters shift skin color and crush detail.
Slider starting points
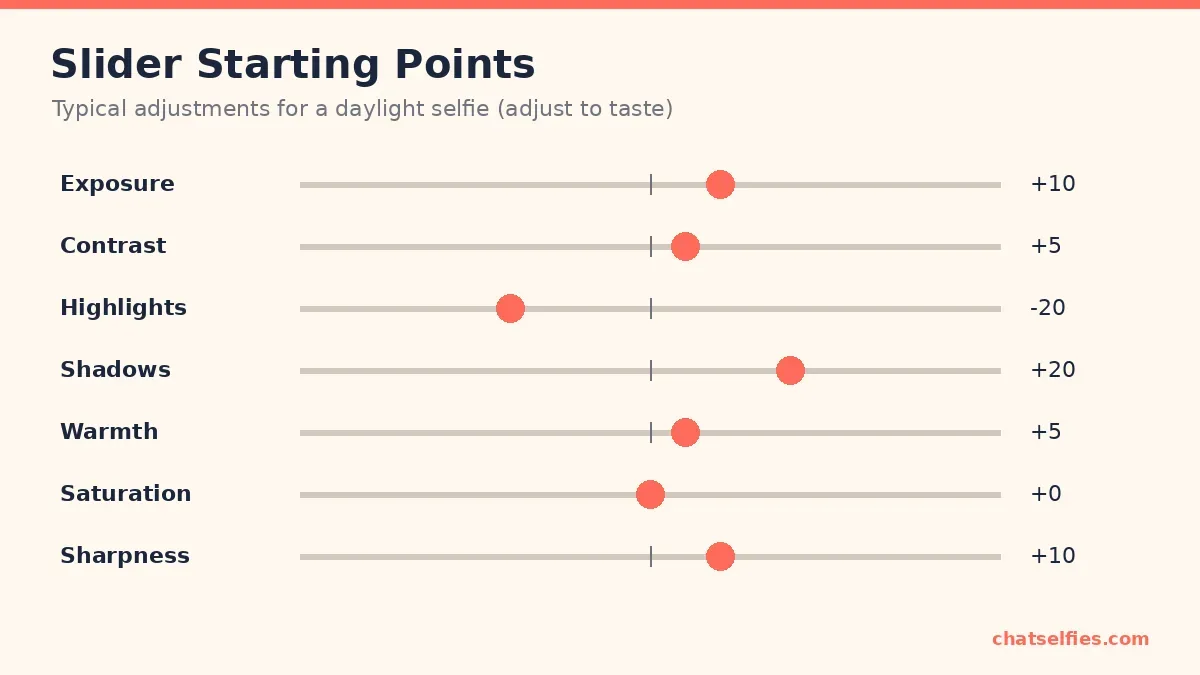
For a typical daylight selfie, try these as a starting point, then adjust by eye: exposure +10, contrast +5, highlights -20, shadows +20, warmth +5, saturation 0, sharpness +10.
Different apps use different scales (some go from -100 to +100, others from -1 to +1), so think "a small nudge" rather than exact numbers. Notice what's missing: saturation stays at zero. Boosting saturation pushes skin toward orange quickly. If you want more color, try a "vibrance" slider instead, if your app has one; it protects skin tones better.
How strong should a filter be?
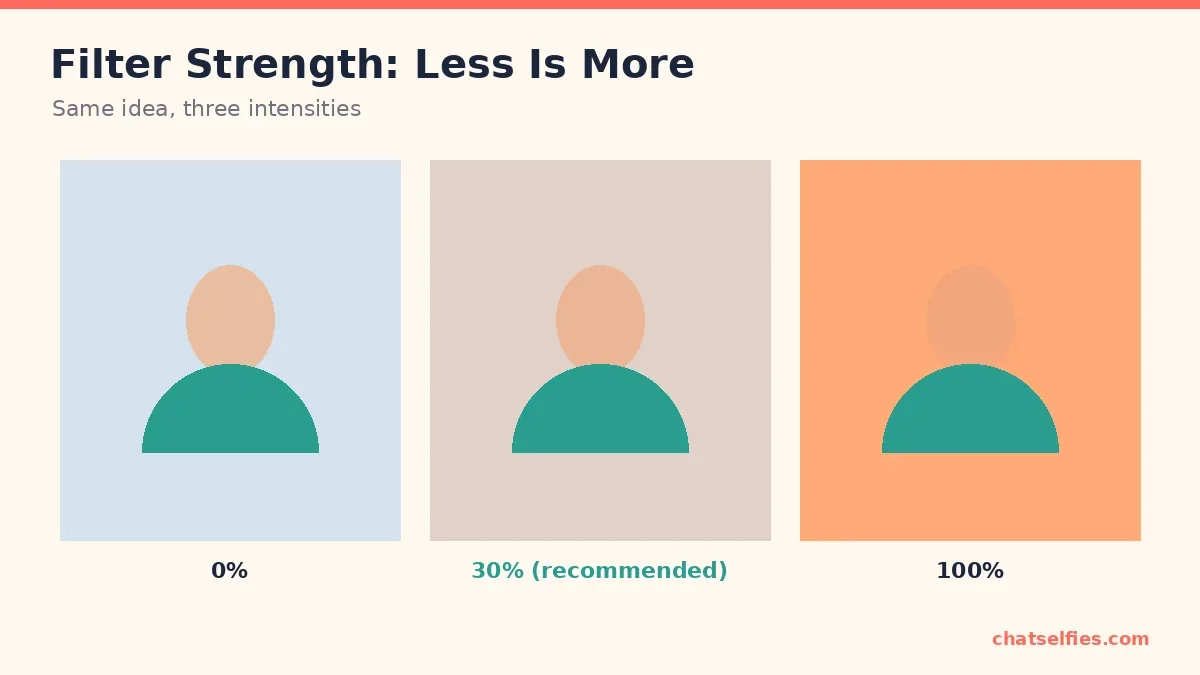
Look at the three versions above: 0% is accurate but plain, 30% adds mood while skin still looks natural, and 100% turns the whole frame one color. Around 30% is where most filters look intentional rather than obvious. Use the same filter at a similar strength across a set of photos, and your feed looks consistent without looking processed.
Free tools that do all of this
- Your phone's built-in editor (Photos on iPhone, Google Photos or Samsung Gallery on Android) handles crop, light, color and filters, and keeps the original so you can undo later.
- Snapseed (free, from Google) adds precise tools such as selective adjustments and healing.
- Adobe Lightroom mobile has free core editing tools, with extra features behind a subscription.
For AI-powered extras like background removal or enhancement, read our AI photo apps guide first, especially the privacy checklist.
Common editing mistakes
- Over-smoothed skin. If you can't see any texture at full size, pull it back.
- Orange or grey skin from too much warmth, saturation or shadow lift.
- Halos around your head from heavy "clarity", "structure" or HDR-style sliders.
- Re-editing a screenshot. Screenshots and app-saved copies are compressed. Always edit the original photo.
- Reshaping your face or body. Small reshapes are easy to spot (look for bent door frames and wavy backgrounds) and they rarely look like you.
Photo still not working? Some problems can't be edited out, such as motion blur, heavy grain or a face in shadow. Our fix-it guide shows how to avoid them next time, and the technique guide covers light and angles.