
Selfie Technique: Light, Angles and Poses That Work
A great selfie is mostly light, then angle, then a few small habits. You don't need a ring light or a new phone. You need a window, the right phone height and a couple of poses you can repeat without thinking.
The short version
- Face a window, with the phone between you and the light.
- Hold the phone 10-20° above eye level, at arm's length.
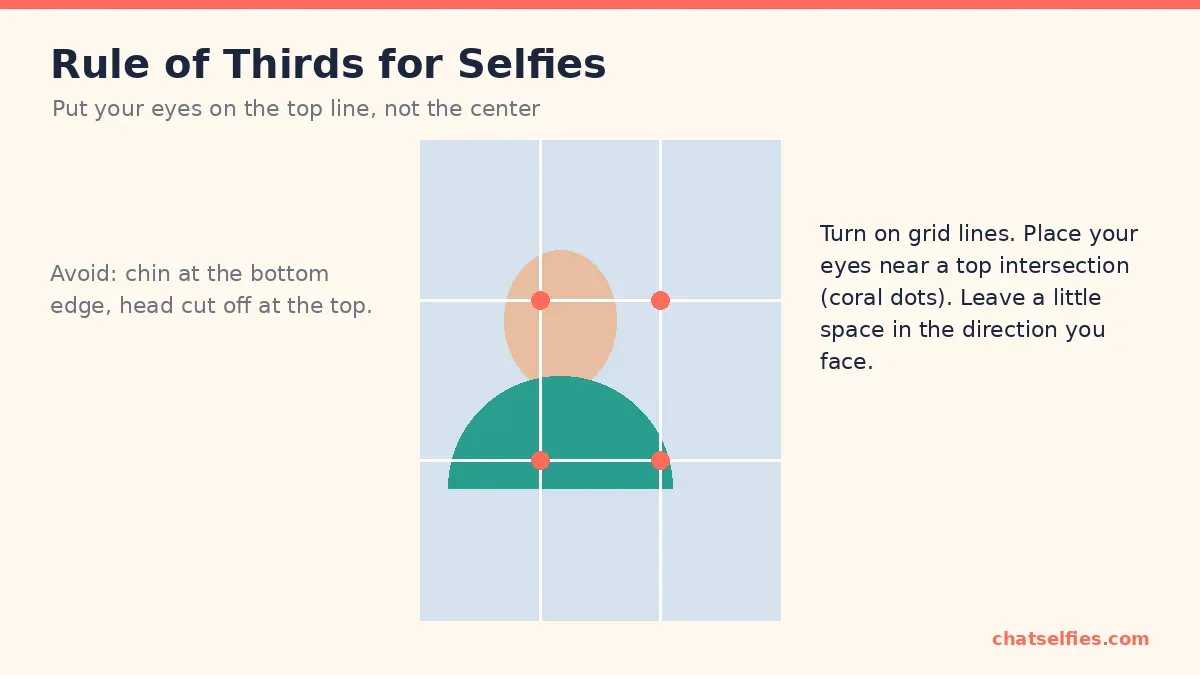
- Put your eyes on the top third of the frame.
- Pick one pose (chin out and down, or a 3/4 turn) and take several frames.
Light: start with a window
Daylight from a window is soft, even and free. It fills in the small shadows under your eyes and gives your eyes a natural sparkle (the reflections photographers call "catchlights"). Overhead ceiling lights do the opposite: they drop shadows into your eye sockets and under your nose.
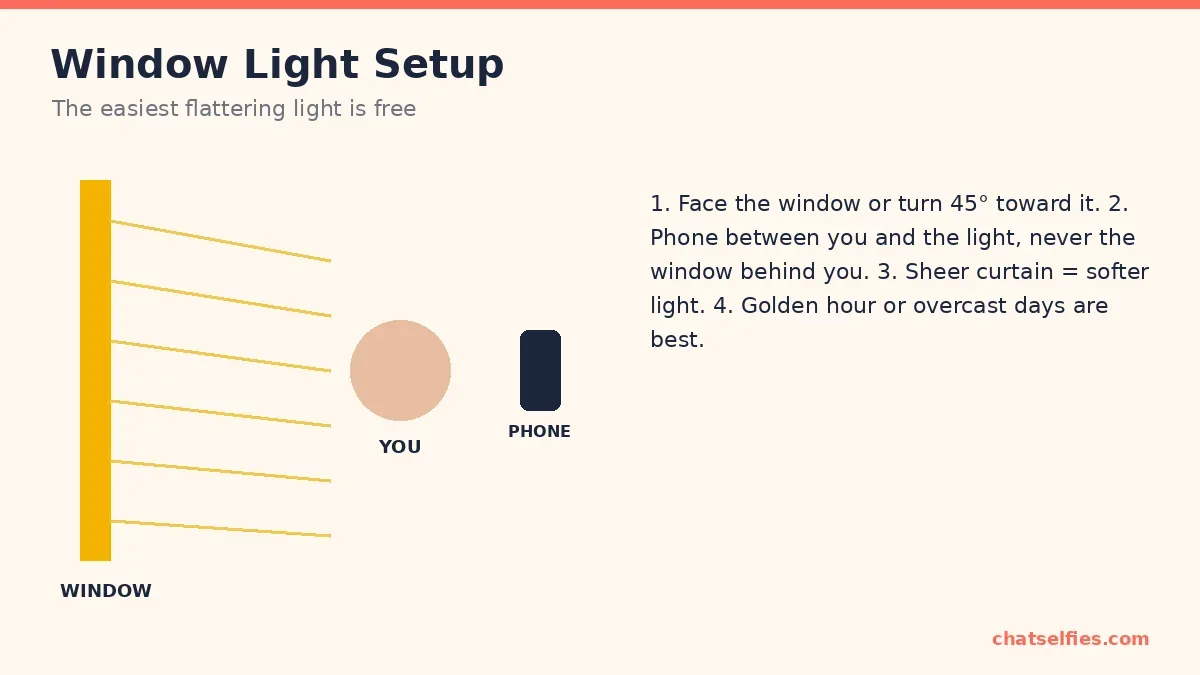
- Face the window, or turn about 45° toward it for a little more shape on one side of your face.
- Keep the phone between you and the light. Never put the window behind you: the phone exposes for the bright window and your face turns into a dark silhouette.
- Soften harsh sun with a sheer curtain, or move a step back from the glass.
- Pick your time. Overcast days and golden hour (the hour after sunrise and before sunset) are the most flattering. Midday sun straight through a window is the hardest.
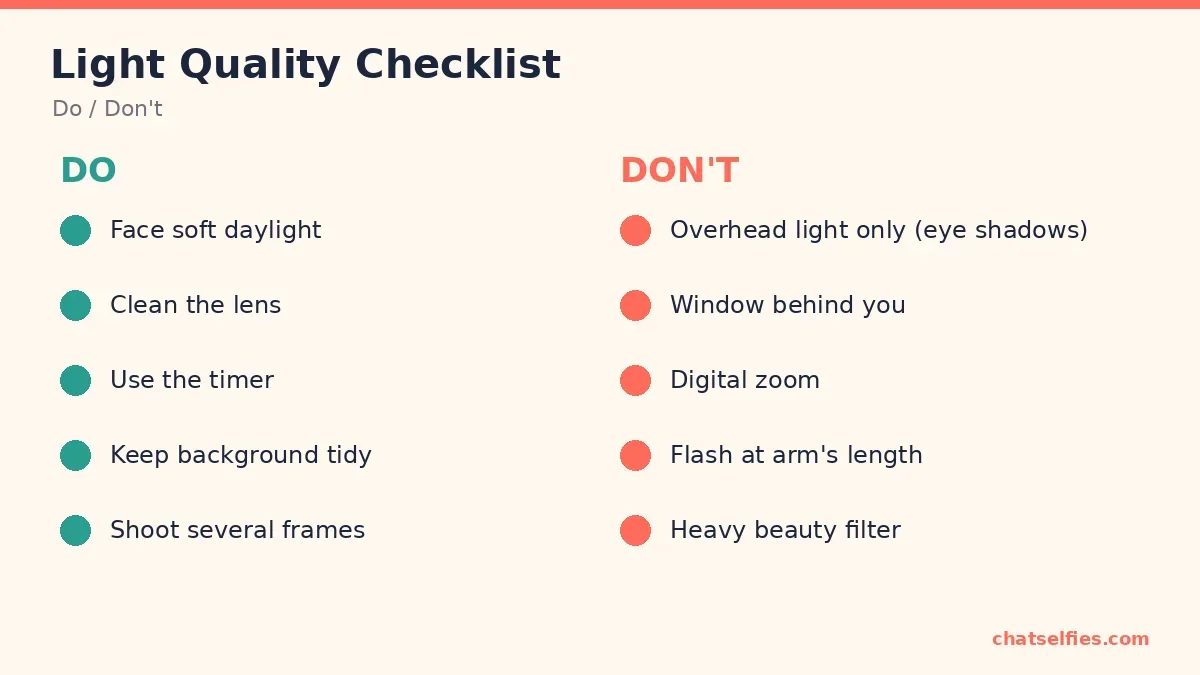
Two items on that list surprise people. Digital zoom on the front camera usually just crops and enlarges, so the photo gets softer. Step closer or crop later instead. And flash at arm's length flattens your face and lights up every bit of shine; a bright screen or window light looks far better.
No window? Try these
- Stand facing a bright lamp with a white or cream shade, about a meter away, rather than under a ceiling light.
- Outdoors, step into open shade (the shadow of a building, not under leafy trees that throw spotty light) and face the open sky.
- At night, face a lit shop window or a bright screen, and hold the phone very still. Low light is the number-one cause of grainy selfies.
Angle: slightly above eye level
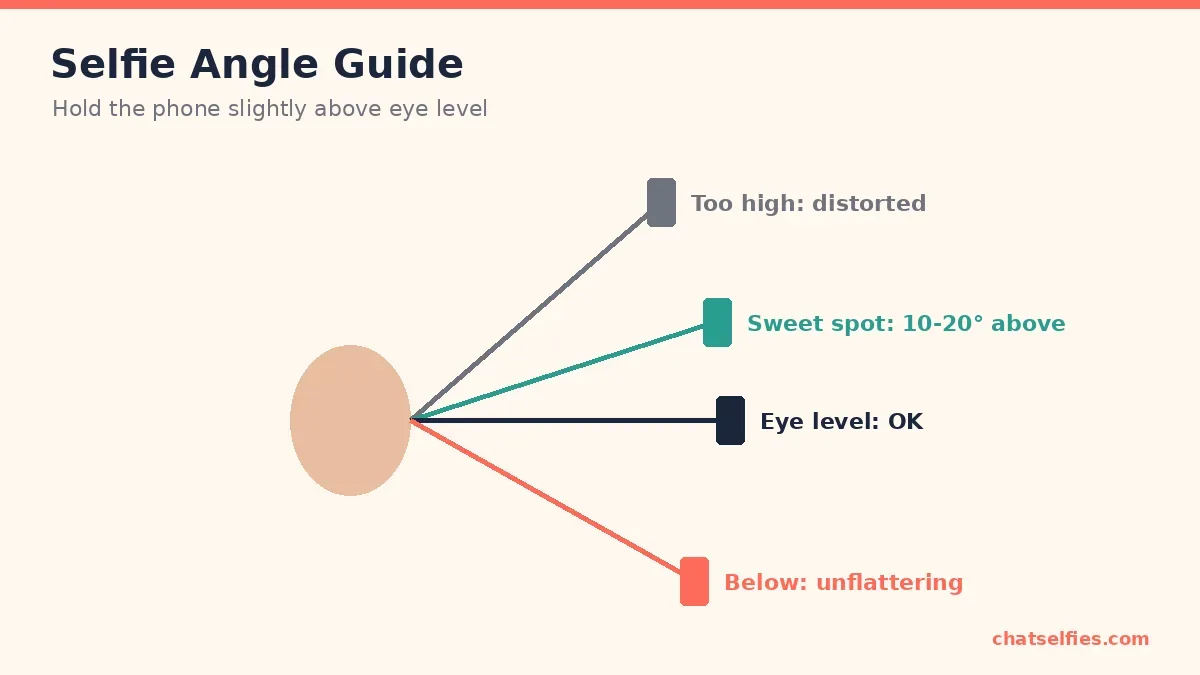
Front cameras are wide-angle lenses. Whatever is closest to the lens looks bigger. When the phone is below your face, that's your chin and nostrils. When it's slightly above, it's your eyes, which is usually what you want people to notice.
- 10-20° above eye level: the sweet spot for most faces. Tilt the phone down slightly so it points at you.
- Eye level: honest and fine, especially for a straight-on, passport-style look.
- Far above: the dramatic overhead angle shrinks your body and distorts your face. Use it on purpose, not by accident.
- Below: almost always unflattering.
Distance matters as much as height. Holding the phone very close makes noses and foreheads look bigger and faces look wider. Hold it at full arm's length (or use a stand and the timer) and crop in afterwards. The result is a more natural face shape.
Framing: eyes on the top third
Turn on grid lines (see our camera settings guide) and put your eyes on the top horizontal line, near one of the top intersections. Leave a little space on the side you're facing. Check the edges for clutter before you shoot: a door frame growing out of your head or a laundry pile in the corner is the kind of thing friends spot first.
Five poses that work for anyone
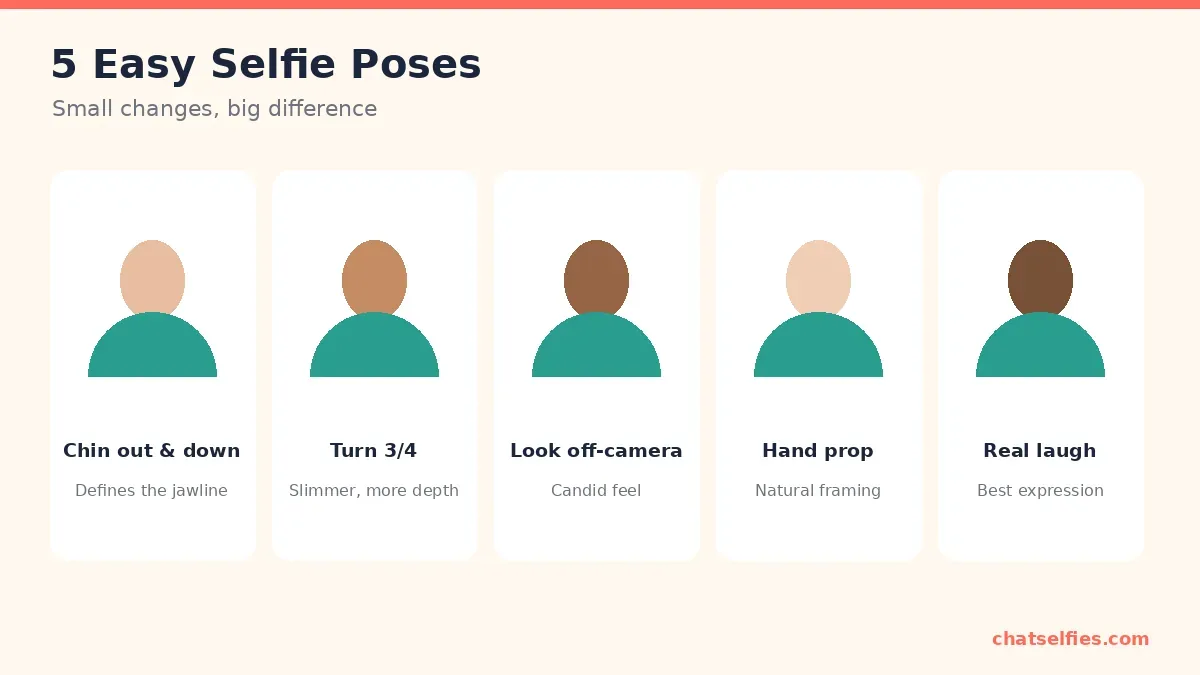
- Chin out and down. Push your face slightly toward the camera, then tip your chin down a little. It sounds odd and feels odder, but it defines the jawline and removes the "double chin" that comes from pulling your head back.
- Turn 3/4. Turn your shoulders and face about a quarter away from the phone, then bring your eyes back to the lens. It adds depth and looks slimmer than a square-on shot.
- Look off camera. Look past the phone toward the light, or down and to the side. It feels candid, and it's a good way to break up a feed full of straight-on shots.
- Hand prop. Rest a hand lightly near your chin, hair or collar, or hold a cup. It gives your hands something to do and frames your face. Keep the hand relaxed and slightly turned, not flat to the camera, because hands close to the lens look big.
- Real laugh. Think of something genuinely funny, or have someone talk to you, and shoot in burst. A real laugh beats a held smile every time.
Expression: relax your eyes
A held smile goes flat after a couple of seconds, and the eyes stop matching the mouth. Breathe out, drop your shoulders, and smile on the shot rather than before it. A slight narrowing of the lower eyelids (what photographers sometimes call a "squinch") looks more confident than wide, surprised eyes.
Take more frames than you think
Professional photographers shoot dozens of frames to get one keeper, so you can too. Take 10 to 20 shots, change the angle or pose slightly between bursts, then delete everything except the best one or two. Burst mode or the timer's multi-shot option (if your phone has one) makes this painless.
Next step: once you have a good frame, a light edit finishes it. See how to edit a selfie in six steps. If something keeps going wrong (blur, grain, orange skin), the fix-it guide covers each problem.