
The Best Phone Camera Settings for Selfies

Most "bad camera" selfies come from a few default settings, not from the phone. Turn on the six settings below once, and every selfie after that starts from a better place. It takes about five minutes on an iPhone, a Google Pixel or a Samsung Galaxy.
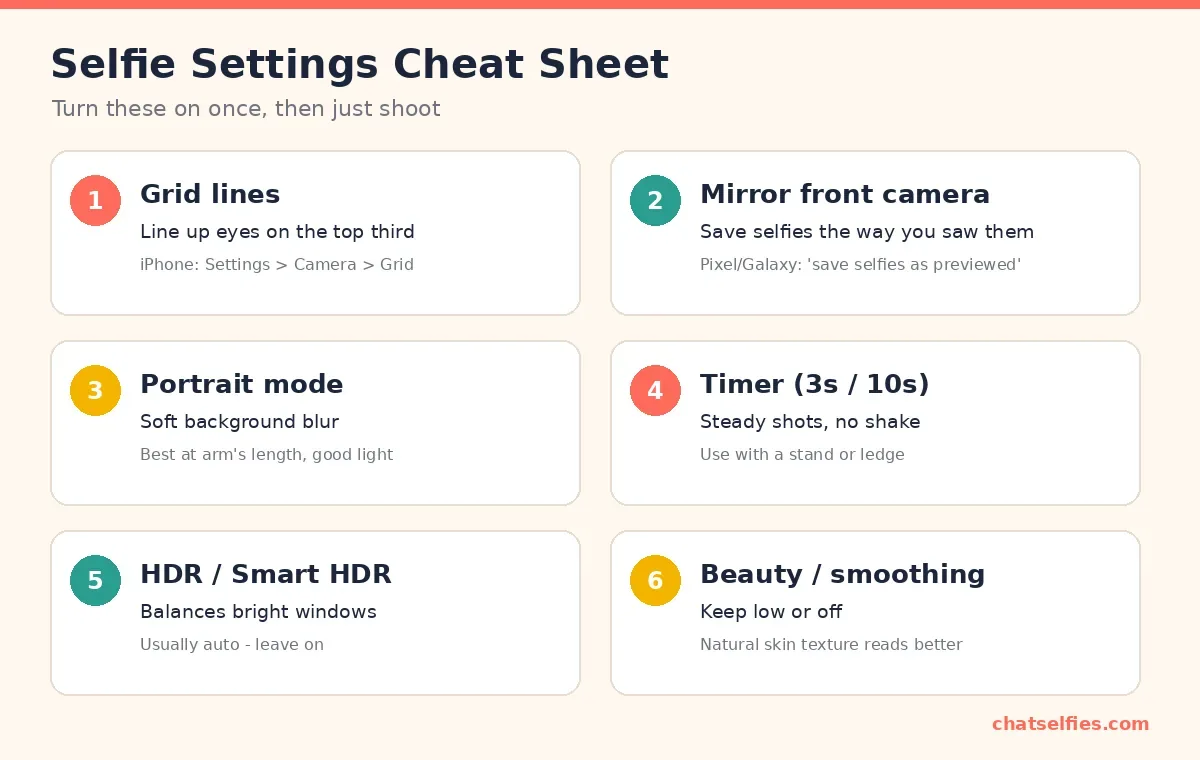
The short version
- Grid lines on, so you can put your eyes on the top third.
- Mirror front camera set the way you like to see yourself.
- Portrait mode for a soft background, in good light at arm's length.
- Timer (3 or 10 seconds) whenever the phone can rest on something.
- HDR left on automatic.
- Beauty or smoothing low or off.
1. Turn on grid lines
The grid splits the screen into three columns and three rows. It doesn't appear in the photo; it's only a guide on screen. With it on, you stop putting your face dead center and start placing your eyes along the top line, which is where most portraits look balanced.
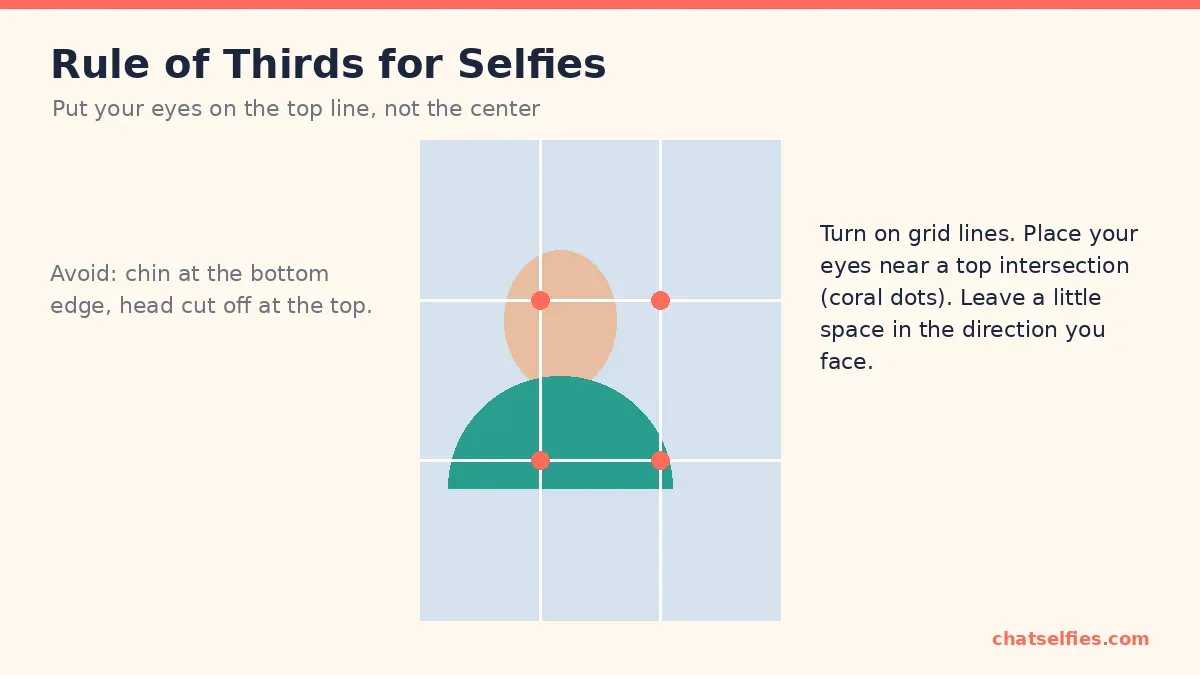
Two things to avoid: a chin sitting on the bottom edge of the frame, and the top of your head cut off by accident. If you want a tight crop, crop through the forehead on purpose, not through the chin. On a Pixel you can also choose a 4x4 or golden-ratio grid; 3x3 is the one to start with.
2. Decide how mirroring should work
The front camera preview is always mirrored. You see yourself the way a bathroom mirror shows you, because that's easier to aim. What changes between phones is the saved photo:
- Mirrored saved photo: the picture matches what you saw on screen. It usually looks "right" to you, because it's the face you know from the mirror. Text in the background reads backwards.
- Unmirrored saved photo: the picture shows you the way other people see you. Text reads correctly, but your face can feel oddly "off" at first, because you're used to the mirror version.
Neither is wrong. If your selfies keep looking strange to you, turn mirroring on. If you often photograph signs, shirts or book covers, leave it off. The setting is called Mirror Front Camera on iPhone and Save selfie(s) as previewed on Pixel and Galaxy. Some Pixels label it "Keep selfies as seen".
3. Use portrait mode in good light
Portrait mode blurs the background so your face stands out. It works best at arm's length in decent light. In dim rooms it can smear the edges of hair, glasses and earrings. Check those edges before you post. Many phones let you change or remove the blur afterwards in the photo editor, so it's a safe default when the light is good.
4. Use the timer when the phone can rest
Pressing the shutter button shakes the phone, especially one-handed. A 3-second timer fixes that. A 10-second timer gives you time to step back for a half-body or group shot. Lean the phone against a glass, a shelf edge or a book. That also lets you use the rear camera, which on most phones is sharper than the front one.
5. Leave HDR on automatic
HDR (high dynamic range) combines several exposures, so a bright window and your face can both look right in the same shot. On most recent phones it runs automatically, and you rarely need to touch it. If you have an option such as "Auto HDR" or "Smart HDR", leave it on.
6. Keep beauty and smoothing low or off
Beauty modes smooth skin, slim faces and sometimes enlarge eyes. A little can hide a blemish; too much reads as plastic, and friends notice. Start with it off. If you add smoothing, do it later in an editor where you control the strength. Our editing guide covers that.
Bonus: pick the right photo format
iPhones offer two formats under Settings > Camera > Formats. High Efficiency saves HEIF/HEIC files, which take up less space. Most Compatible saves JPEG files, which open everywhere. If you regularly move photos to an older Windows PC or upload them to sites that reject HEIC, choose Most Compatible. Otherwise High Efficiency is fine; iPhones usually convert to JPEG automatically when you share. On Pixel and Galaxy, format options vary by model, so check your Camera app's settings.
Where each setting lives
Menu names move around between software updates. We checked the paths below against Apple, Google and Samsung's own help pages on October 13, 2026.
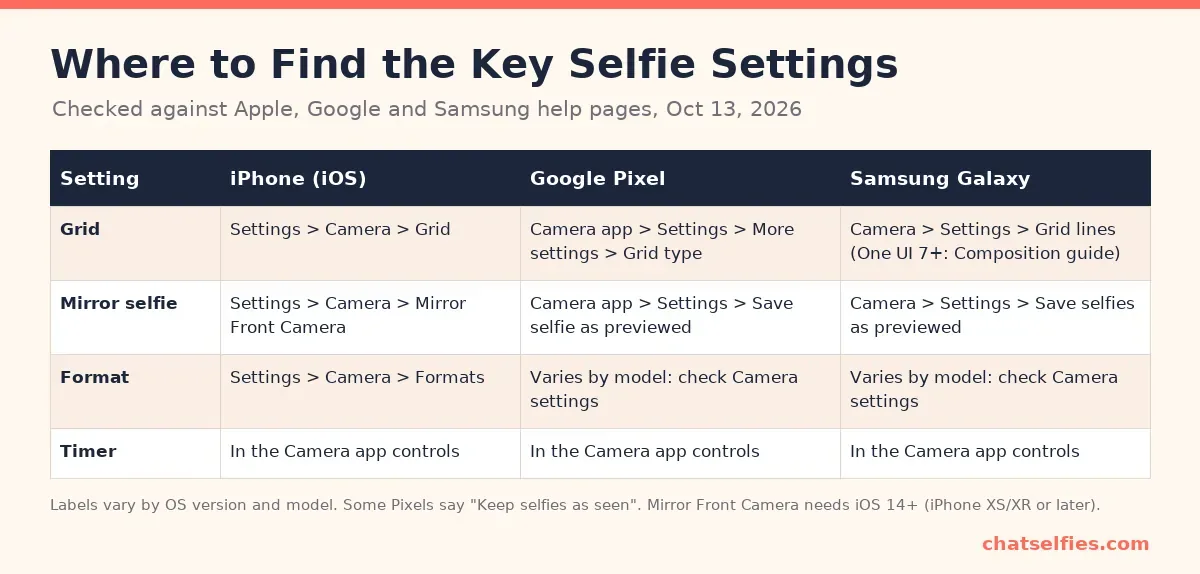
| Setting | iPhone | Google Pixel (Pixel Camera) | Samsung Galaxy |
|---|---|---|---|
| Grid | Settings > Camera > Grid | Camera app > Settings > More settings > Grid type | Camera > Settings > Grid lines (older One UI) or Composition guide (One UI 7 and later) |
| Mirror selfie | Settings > Camera > Mirror Front Camera (iOS 14+, iPhone XS/XR or later) | Camera app > Settings > Save selfie as previewed (some versions: "Keep selfies as seen") | Camera > Settings > Save selfies as previewed |
| Format | Settings > Camera > Formats | Varies by model | Varies by model |
| Timer | Camera app controls | Camera app controls | Camera app controls |
Before every selfie: the 10-second check
- Wipe the front lens on your shirt or a microfiber cloth. A thumbprint is the most common reason a selfie looks hazy.
- Find the light: face a window or the brightest part of the room.
- Tap your face on screen, so focus and exposure lock on you, not the background.
- Raise the phone a little above eye level. Our technique guide explains why.
Still blurry, flipped or too dark? Our fix-it guide walks through the common problems one by one.